Smoked Shrimp
This smoked shrimp recipe is one I have been longing to post ever since I first made it. I usually like to try the recipe out a few times to make sure I’ve got the best taste possible. I love this smoked shrimp recipe so…
BBQ recipes, product reviews, & how-to's
This smoked shrimp recipe is one I have been longing to post ever since I first made it. I usually like to try the recipe out a few times to make sure I’ve got the best taste possible. I love this smoked shrimp recipe so…
BBQ Smoked Chicken Wings are LIFE! I think you’re gonna love these BBQ smoked chicken wings. I used to have a casual relationship with chicken wings. I’ve liked them, but never enough to base a meal around…that is, unless some buddies wanted to meet up…

Since I BBQ multiple times a week, one thing that I’ve come to appreciate is a good cutting board. I’d been using a generic cutting board I bought from Walmart and I knew I’d beaten the crap out of it when I noticed the wood splitting apart along the connected pieces. My time for wanting a new cutting board became a necessity and since I am using my board for prepping, slicing, and presenting, I decided to splurge and look into buying a solid, beautiful and unique cutting board.
Through my Instagram account (@learningtosmoke), I found a custom board maker out of Austin, TX called Flying Dust Woodworks (IG: @flyingdustwoodworks). I sent a DM and quickly got a response from David, the owner. I gave him the dimensions and told him which colors I wanted incorporated into the board and quickly received a quote. After agreeing to the price and paying in advance, David got to work on the board. The quality of the customer service provided was top notch. Very transparent: sent me updates every couple of days on the board’s progress, when it shipped and even when he was notified it was delivered. I’ve also had questions since receiving my board and he has been available to help. Customer service definitely adds value to a product.
After a few uses, the board started to lose its color because it was drying out after each wash. To give more background, I live in a high elevation area and have hard water here, which doesn’t help.

Thankfully, David informed me of some board conditioner you can buy at the hardware store to help keep its original color and quality. It was easy to apply and looks great again.

If you follow me on Instagram, then you will have noticed this board when I display some of my BBQ. It makes for beautiful presentation and something that will hold up for a long time.
Here are my pros and cons for this cutting board:
I love this board. I consider it a piece of art that I only use for special cuts of meat, such brisket and ribeye cap. It was by far the most I’ve spent on a cutting board but I absolutely love it and I look forward to ordering another one soon. I highly recommend each of you get a custom board and if you need an idea of where to go, email David at [email protected].


BBQ is a beautiful thing. The hours of work put in to trimming, rubbing, injecting (for some), smoking resting, and slicing (or shredding) pays off when you take that first bite…and second, and third, and so on. You want to get your fill and share…
Having an Instagram account and following other barbecuers has been an enlightening experience. I feel like I’ve been able to learn so much from other BBQ’ers around the world and make some friends along the way. And believe it or not, I’ve been able to…


I love using my digital thermometers. I love the quick, accurate reading I get from the Thermopop and even quicker response from the Thermapen ONE. So when Thermoworks released a new device that caters to BBQ’ers like myself, I had to pretend my other awesome digital thermometers wouldn’t suffice and that I needed yet another one. Fortunately, I was able to get my hands on the Smoke the day before making turkey for Thanksgiving dinner.

The Smoke is a wireless, dual probe thermometer for BBQ that monitors both the temperature of the food and of the pit. I took pictures of the unboxing so you could see exactly what comes in the package:


From left to right in the picture above, the contents are as follows:
Assembly is quite easy. Just press the power buttons on both devices and plug in the probes.
Referring to the picture above, I’ll review what each button on the front of the base unit means:
SET: used to set alarms. You can set both high and low alarms for each probe.
VOL: changes the alarm volume setting or sets mute.
UP and DOWN ARROWS: used to adjust the high and low alarms.
LIGHT ICON: turns the backlight on for 20 seconds.
ON/OFF: turns alarm on and off. You can have the alarm off if you just want to monitor temps and not be alerted.

I show this picture of the back of the devices for a few reasons. First, the buttons:
ON/OFF: turns device on. Hold for three seconds to turn off.
°C/°F: changes display between Celcius and Fahrenheit. Device defaults to Fahrenheit.
CAL: this button is used for calibration purposes. The device is pretty accurate, so you may never need to use it. However, it’s nice to have just in case.
TRANSMISSION BUTTON: used to turn the transmission to the receiver on and off. Can be used to connect multiple receivers if buying additional ones.
Next, those silver rectangles are magnets. These come in helpful if you want to stick the base unit to the smoker or its metal appendages (however, I mainly use it to stick to the side of my fridge when not in use). Third, the base unit has a kick stand that folds out to stand on its own. And finally, I post this pic to show the batteries are easy to access and replace if needs be (they take AA batteries).
After you’ve powered on the base unit, turn on the wireless receiver. At first, the receiver will show “con”, which means it is in the process of connecting to the base unit. This may take a few seconds to connect. The connection is strong enough up to 300 feet apart, but is reduced when obstacles such as walls or doors stand between the two devices. With that said, I’ve walked around my house and have had no issues with the connection (with the base unit outside).

One thing I’ve noticed with the wireless receiver is that there is some latency between its connection with the base unit. It’s most noticeable when getting your smoker/grill up to temps. The picture I share here shows a small bit of lag between the two devices.

The bit of lag should be expected with wireless connections like this and it isn’t even a bother.
I’ve used the Smoke many times now and I can honestly say I love it. I can’t imagine BBQ’ing without it. Thermoworks makes high quality digital thermometers and they’ve hit another home run with the Smoke!
Thermoworks products can be found in kitchen stores, BBQ shops, and at the Thermoworks website itself. Note: if you order through the website, they send you a little complimentary bag of Jelly Belly’s!
Lighting up charcoal isn’t a hard thing to do, but there are preferred ways to do it. Here are a couple that are most ideal: Chimney starter: putting your coals in a chimney starter is a great way to get them heated up quicker. First, take…

Growing up in St. Louis, I was exposed to some unique foods to the region: gooey butter cake, toasted ravioli, and pork steaks. It wasn’t until I moved out West that I realized these things were not commonplace everywhere else. Being the BBQ nut that I…

I have been BBQ’ing for a full year now and during these 12 months, I have smoked dozens of pork shoulders. I was doing them the same way for a while in order to get myself more confident with the process. In fact, you can find the recipe I used repeatedly here. Now that my comfort level is to the point that I no longer need to refer to a recipe, I’ve decided to experiment a little more with the Boston butts. The warmer time of year gets me thinking about tropical vacations and the fun meals that come along with them. One of my many sisters-in-law (I married into a family of eight siblings) has been wanting to get family together and have a backyard luau with kalua pork. I summoned the powers of cyberspace and looked up recipes I could use in the smoker and came across one from Harry Soo at www.slapyodaddybbq.com. I used the kalua pork recipe from his site and added some personal touches of my own.
For your reference, the term “kalua” means “cook in an underground oven.” Not to be confused with Kahlua, the sweet, coffee-flavored alcoholic beverage from Mexico. I’m sure you could incorporate Kahlua into your kalua, but I chose Worcestershire Sauce instead because I don’t like to party.
SMOKED KALUA PORK
Ingredients:
1 pork shoulder (Boston butt), about 7 lbs.
2 teaspoons Hawaiian red sea salt
2 Tablespoons chicken bullion
1/4 Cup of your favorite BBQ rub
1-2 banana leaf/leaves
Mopping Sauce:
1 13 oz. can crushed pineapple
1/4 Cup (or half stick) butter, melted
1/4 Cup brown sugar
3 Tablespoons apple juice
1 Tablespoon Teriyaki sauce
Wood: hickory, peach
Smoker temp: 275°F
Meat temp: 195-203°F
Time: nine hours (five unwrapped, four wrapped)
To begin, I started the night before to let the ingredients flavor up the shoulders a bit (note: don’t forget to rinse and pat dry the pork shoulders prior to seasoning). You can do this at least an hour before smoking, but I didn’t want to wake up earlier than I needed to I chose to do it this way. First, I like to apply the Worcestershire sauce to help the other ingredients stick. The Hawaiian red sea salt, chicken buillon, and your favorite rub can be mixed together and applied, but I put them on one at a time. Regarding these ingredients, Hawaiian red sea salt can be tough to find locally. That is, unless you live in the Aloha State. I was able to find this at an Asian market, as well as the banana leaf to be used later. If you have no luck finding it near you, there’s always Amazon. If you’re like me and don’t purchase chicken bullion much, if at all, then here’s a tip for you I learned from this experience: bullion doesn’t always come in cubes. You can buy it already in the powder form. If you buy it in cubes, then you have to beat it down into powder, which I did by placing in a plastic bag and pounding with a rolling pin. For the rub, I tried the Bacon BBQ rub from Meat Church. It was my first time using it and I loved the flavor when I sampled it at my local BBQ shop.

After seasoning, I placed both pork shoulders into a large bowl and let rest overnight (FYI- the recipe I am posting is for one pork shoulder).

I got my smoker going the next morning and got the temperature of 275°F. Some do it at a lower temp and have it cook longer, but I like the 275°F temp and keep it in there for about 5 hours for this first step. Usually with Kalua pork recipes, they call for mesquite wood to smoke with. Since I had no mesquite wood on me, I used hickory and then I also wanted to put some Peach wood in there for a little bit of a sweeter flavor. I let that go for five hours, spritzing with a mixture of apple juice and apple cider vinegar once an hour.

After five hours and the internal temperature at about 150°F, I removed from the smoker. Leading up to this, I lay down two layers of heavy duty foil first, then a banana leaf. The banana leaf is usually a difficult one to find, but I found mine locally at an Asian market, just like the Hawaiian red sea salt. Rinse the banana leaf put it down on the foil, and then get the pork shoulder and place it on the banana leaf for wrapping, but don’t wrap yet.

Now you want to get your mopping sauce (hopefully you thought ahead unlike me and have already put it together) and spread it all over the pork shoulder. If you forgot what the ingredients were, then check the picture below:

I didn’t use all of the sauce, but plenty enough. The melted butter, brown sugar, and crushed pineapple together made me want to eat this mixture by the spoonful, but I exercised restraint and added the other two ingredients for mixing. I improvised with the teriyaki sauce. It just seemed fitting that a Hawaiian dish but have some sort of Teriyaki flavoring to it.

I apply the sauce and the pork shoulder looks like a mess. That’s okay, because it’s supposed to happen. Now wrap up in the banana leaf. The pack I bought had some pretty long leaves and I used one to wrap it up. It didn’t cover the pork shoulder completely, but the foil will help keep things in place.

I’m still unsure how relevant the banana leaf is to the flavor. I do know it is tradition to have it in the recipe for wrapping purposes because the leaf can hold the heat and juices in. When I find out for sure, I’ll update this post with that info.

Now that the banana leaf has wrapped around the pork shoulder, I wrap the foil around it and then throw it in the oven at 275°F for four hours *GASP!* Yep, in the oven because 1) I don’t wanna mess with regulating the heat in my smoker for four hours and 2) the meat had already absorbed five hours of smoke and won’t be able to take in much more than that.

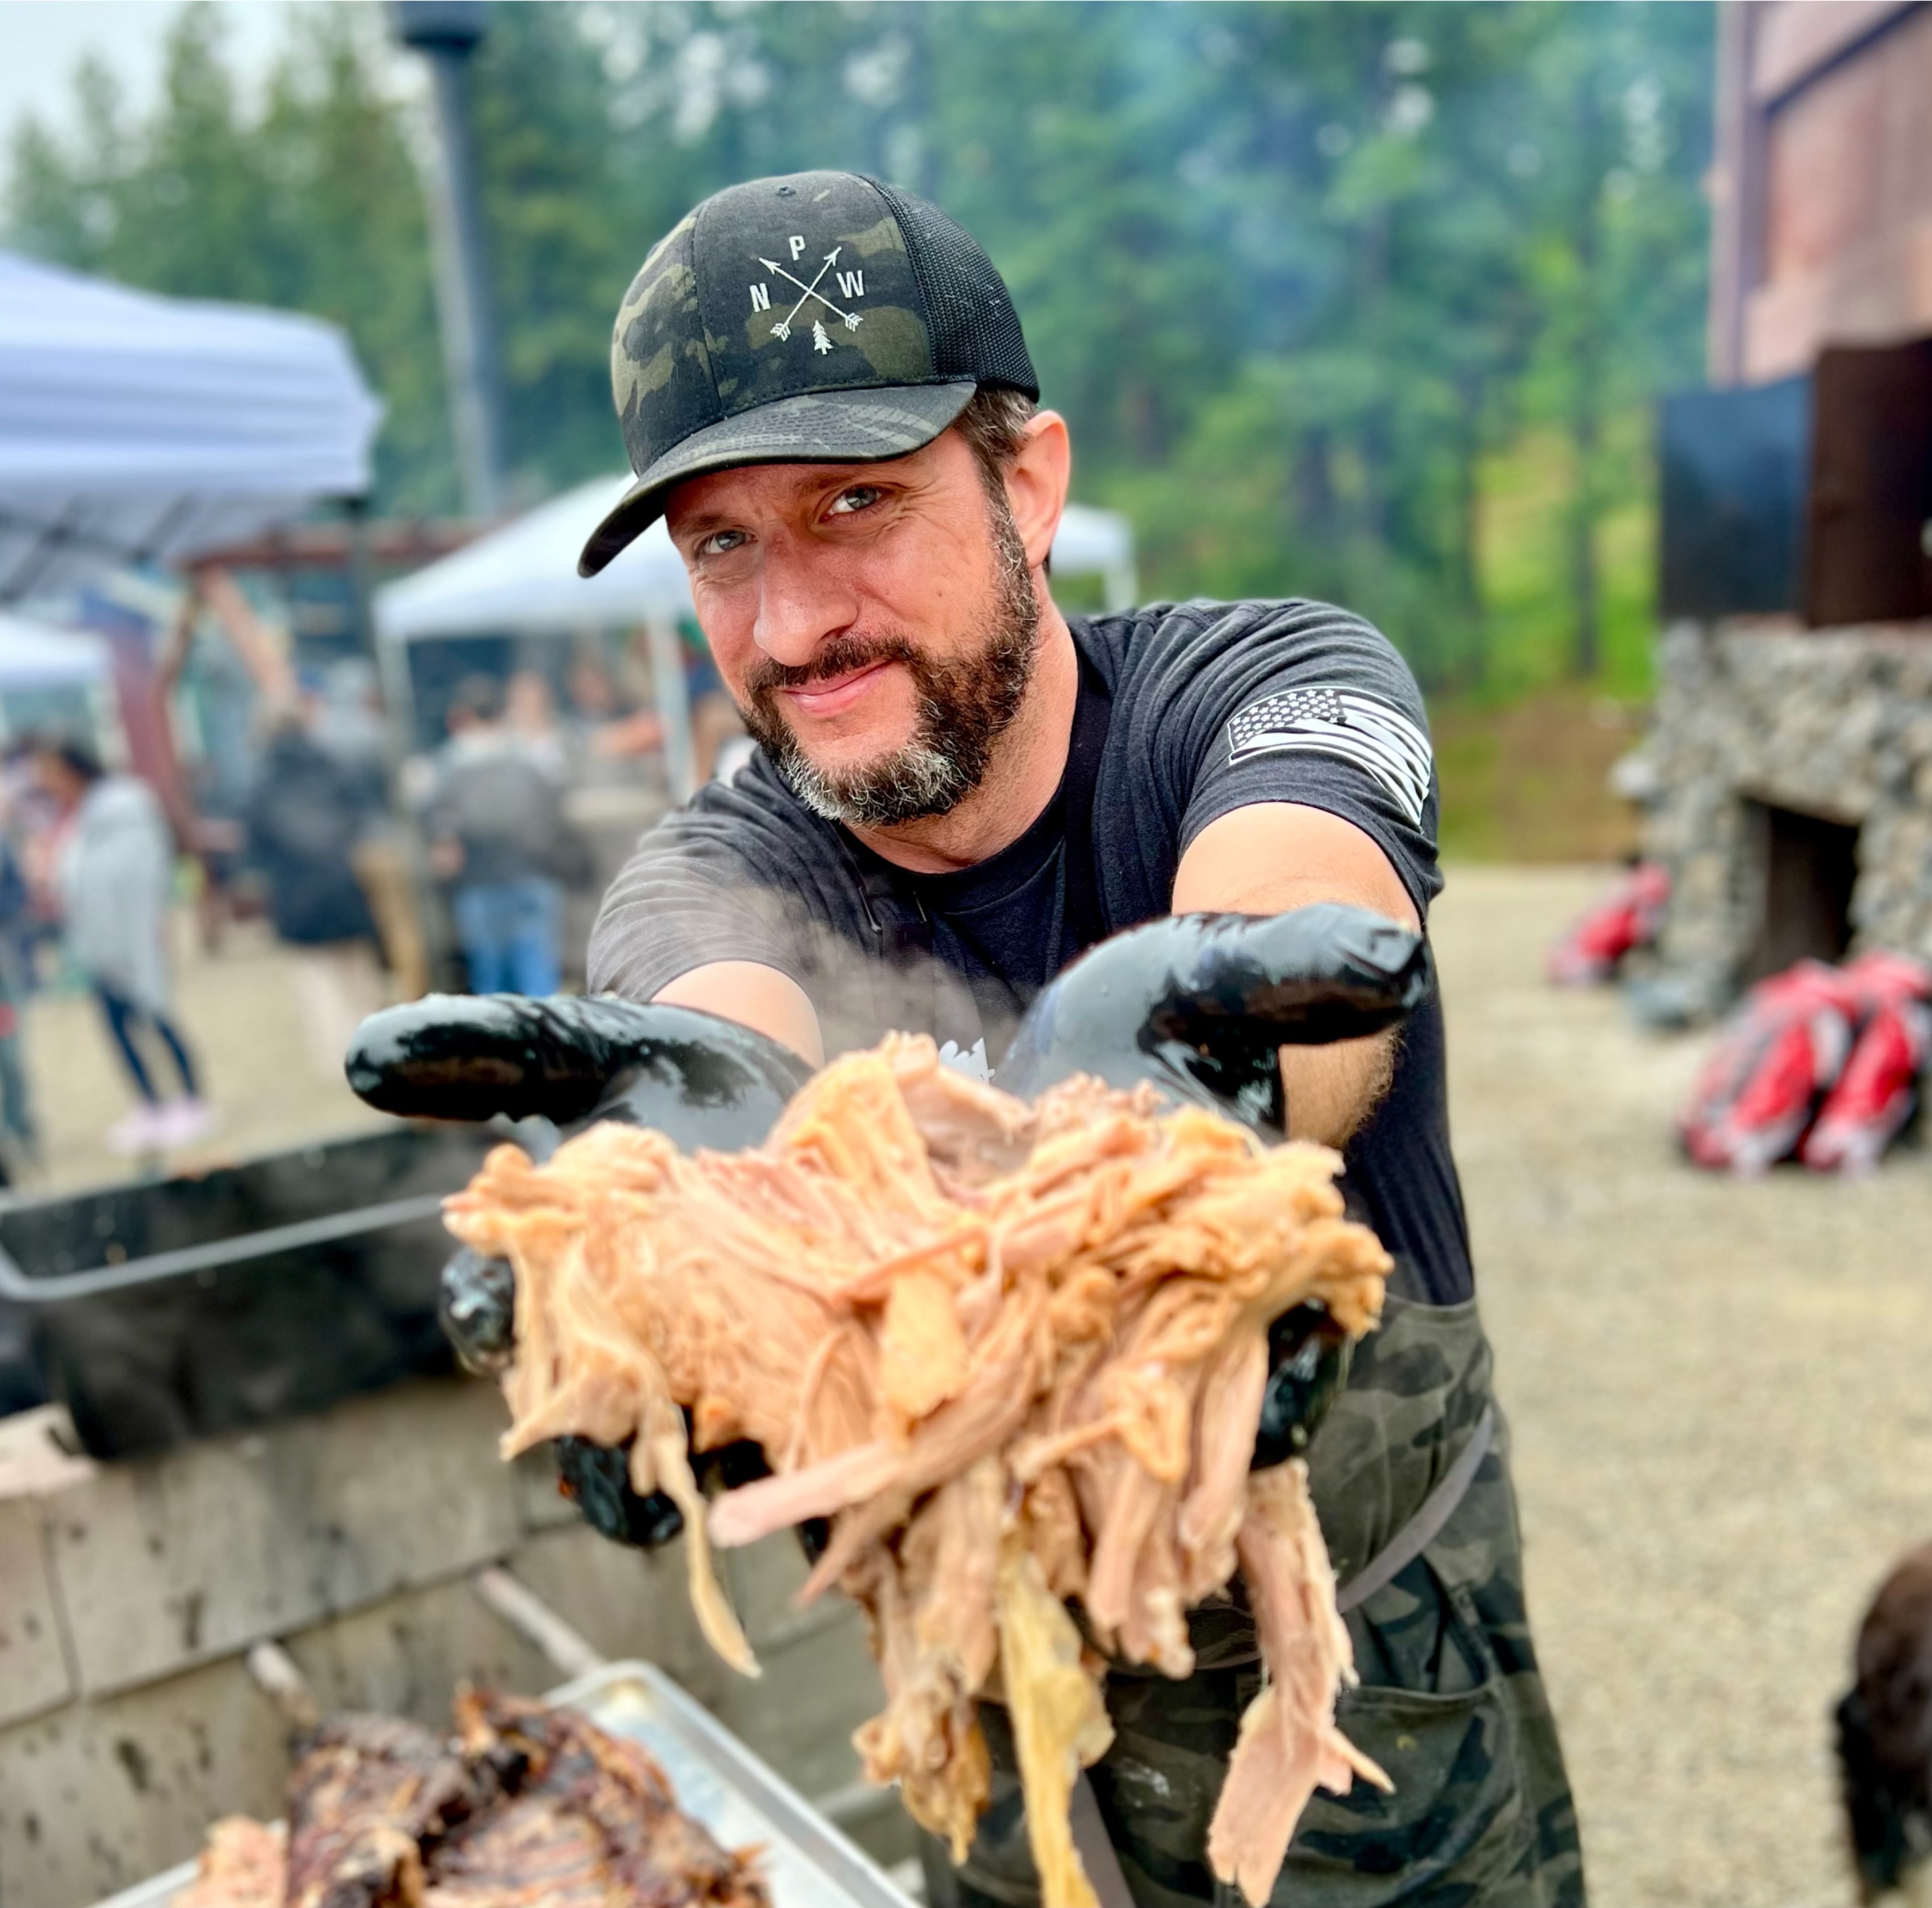
After four hours wrapped in the oven, the shoulder reaches 195°F, which is where pulling the pork gets to the point of easy shredding. I unwrap and let it sit for about 20 minutes so the juices build up.
Between 195-203°F, the internal temp of the pork becomes easier too shred, thus meaning less time it takes to do that and the sooner you can your guests can dig in!

Enjoy!

Sometimes inspiration comes from desperation. I was browsing Instagram the other day and came across a post from Susie Bulloch (@heygrillhey) in which she was making garlic butter burgers (recipe on her website). I wanted them. Badly. I had the hamburger meat, so I was halfway…